Sunday, 31 October 2010
I saw in the experements bellow, that in the areas that got missed by the water the inks didn't touch. So that gave me the idea of making patterns or shapes with the ink. The first one I tried was the cat ( that doesn't look much like a cat). The colours in it I love, but I didn't manage to control the water too well. I'd class this as a happy mistake though because I like the differnence in texture in the watered ink and the dry power.
I tried again with the Green background and a rabbit and it worked as I intended.
Experementing again with the coloured pencils trying to get the right texture and marks. I have begun to transfer what I've learnt from the botanical illustrations into animals. I have also started experementing in ways to mix the pencil in with the colour, as this is what I am hoping to achieve at the end of this project. After I did the girraffe drawing with colour I realised that it is not going to be as easy to introduce colour into every illustration. I do really like the combination of coloured pencil and pencil/graphite.
I am gonig to practice this combination over and over until I get some good quality illustrations. I think the process I went through to get to where I am now was challenging but it was deffinalty the right way to go for my learning style. I am very glad that I have chosen this project to work on as it has changed the direction of my work, deffinatly for the better. I beleive my illustrations are much more captivating with colour and the more I practice the more I can get them to a proffestional standard.
I started using my proffesional coloured pencils rather than the standard ones you get at Smiths. I'm not sure whether they are particulary different, but I thought they felt softer to use compared to the other ones. The colour difference isn't greatly noticable, although these have brighter vibrancy and you dont get that waxy texture as easily as you dont have to press so hard to get the darker colour your after. I am really enjoying using coloured pencils more as the project goes on.
Thursday, 28 October 2010
One line drawings
I have been experimenting with different ways of drawing with coloured pencils. I tried drawing images without taking my pencil off the paper. This has a very nice effect especially in the bottom image of the flower and butterfly. It's not my usual drawing style or my usual drawing material but I still really enjoyed doing this and I felt comfortable and not daunted. I think it has done be good to produce drawings that are loose and flowing rather than my usual tight rejimented drawings.
To get better at using coloured pencils I decided to draw just with the coloured pencils and not try and include my normal drawing just yet. By using just coloured pencil it really shows the quality that can be produced. I would like to do more of this as it is helping me to get more skilled at using this medium particulary bldending and shading.
Tuesday, 26 October 2010
Monday, 25 October 2010
Botanical video
http://www.youtube.com/watch?v=zxL26fIou5o
This is a video briefly expalining how to create botanical illustrations with coloured pencils. The visuals arn't that great as she hasn't got the exposure correct on the camera shes using but just listening to what she said you understand what she is going on about. I find this video pretty useful.
Tips for using coloured pencils
As I am focusing on using coloured pencils, I have done some more research on how to use them effectively. To do this I have looked on the internet for websites that can help me learn more about them. I find looking on the internet reletively easy as it is usually quick to find what you are looking for.
Use colored pencils with a large amount of pigment. These will be more expensive, but brighter and will blend better than the cheaper brands. Less expensive colored pencils contain fillers to cut down on pigment costs and result in washed out colors and layering
Learn the correct colored pencil technique. Crosshatching, hatching, burnishing and scrumbling all play important roles in drawing with colored pencils. Knowing when and how to use these and other methods is half the battle when using colored pencils.
Minimize wax bloom. Wax bloom appears when your drawing surface is overworked or heavily burnished. This layer of wax will rise to the surface and cloud your drawing, tarnishing its original brilliance. To fix, simply wipe off the layer of wax and apply a coat or two of fixative.
Choose the right paper. Depending on how smooth or grainy you want your art to be, choose a paper with a fine to medium tooth. The quality of the paper is also important as cheaper paper will not hold layers and color as well as more expensive paper.
Sunday, 24 October 2010
Colour wheel
Primary colours
In traditional colour theory, these are the 3 pigmant colours that can not be mixed or formed by any combination of other colours. All other colours are derrived from these hues.
Secondary colours
These are the colours formed by micing the primary colours.
Teritary colours
These are the colours formed by mixing the primary and secondary colours.
Friday, 22 October 2010
I am VERY pleased withhow the butterfly photos turned out. I actually didn't use any extention tubes, I just percevered with the macro lens and finally managed to get closer to my subjects after alot of time and fiddling around.
The process in getting a quality macro photograph is very challenging. I have found that you need incredible patience and time to produce around 3 out of 50 good photos. I am still keep to learn more about photography, macro photography inparticular.
Wednesday, 20 October 2010
Water colour
After messing around with coloured pencils, the other material that I wanted to try adding to my work was water colour. I really like the texture and how easy it is to blend the colours together. You can also achieve really nice vibrant colours. Instead of only adding colour to a section of my drawing, I tried using colour all over. I think this is quite effective in this illustration.
I have also had feedback from friends that the colours work really well.
These are two more experements. The top one uses colour in certain sections like I did with the coloured pencil. I quite like this as it give a nice texture to the rabbits fur, although I think that coloured pencils might be a better material to use for that type of thing.
The second illustration went wrong. I got carried away with the pencil and so when the colour was applied it could not be seen very well as it was going into pencil rather than a lighter background.
I have decided that water colour is not the rout I wish to go down with my work. I enjoy using water colours, however I prefer the control I have when using coloured pencils.
Coloured pencils
I started experementing more with coloured pencils. I found them pretty hard to use at first because I'm used to the different variations of pencils from H numbers to B numbers whereas coloured pencils are all the same and very hard. This made shading a different experience to what I'm used to.
This was one of my first attempts at using coloured pencils. It is quite obvious that I had a problem with shading, and getting the confidence to press harder and make stronger marks.
This was a later attempt. I started to accept that the coloured pencils wern't going to meraculously become softer and so started to make bolder marks. I'm quite pleased with the results of this. I perticulary like the fact that I havn't over used the coloured pencil, just using it to sugest the colour on the animal.
experementing with colour
I wanted to learn how to add colour efficiently to my drawings as they looked plain and not very inventive. I started to go into colour towards the start of this project however I decided I want to go deeper and hopefully find a comfortable, and consistant way of using colour in my illustrations. I made some little experements to help me decide which material would work best with pencil and my drawing style.
I decided I liked the texture of the water colours, and I appriciated the variation I could produce with the coloured pencils.
Two at a time..
After my second tutorial, I have ended up doing photography and my drawings parallel to eachother. I havn't found this too challenging as it has been good to have a break from one subject while working on the other.
Monday, 18 October 2010
Fisheye macro
I wasn't sure how or if this was going to work, but I had my new fisheye and I really wanted to use it, so keeping with the macro theme I decided to try taking macro shots with the fisheye.
These were the results. They turned out a lot better than I thought they would. I managed to capture the detail of the dew droplets on the flower petels and still get a depth of field in both the photos.
I didnt use a tripod with this as I was pretty sure it was a pointless excersise but I am suprisingly pleased with the results.
Settings
I did an experement, and took the same photo 3 times.
The first time I set my camera to manual without flash
The second time I set my camera to AV without flash.
The third time I set my camera to macro without flash.
I wanted to see which would be the best for the situation I was in. This was the results:
First shot
Second shot
Third shot
They all turned out very similar, I'm not sure wether this has anything to do with the lighting or whatever. The depth of field has worked very well on all three. I have noticed however that on the third shot, the macro setting, the flowers in the forground look to be more out of focus than in the other photos. This is good as it draws your attention to the subject in focus which is the aim of the photo.
Macro photography Sarah style
Over the weekend I went home for a christening, So I used the opertunity to use my mum's macro lens but also to have natural sceanery around that I can use as my subject. I started in my back garden where I shot mainly botanical photos.
Equipment wise, I was able to use an 1000D SLR camera, a reasonably old but still good tripod,
a macro lens although I'm not sure on the exact measurements.
I got up early in the morning to get full use of the morning light and the dew still lingering on the petels.
I created this photo by using the macro lens and tripod. I didn't need to use flash as it was a bright sunny morning and that light was sufficient. It too a few attempts to get the composition right, but I am quite happy with the results. I edited the levels on photoshop and desaturated the image.
I love the dew droplets on the petels on this photo. I was suprised as to the detail that can be achieved. I had to use flash for this photo as the sun rapidly went in, but that was good because I then had the oppertunity to try using flash in my shots. The way the background went darker from the flash is really effective.
I really thought about composition with this one, and set my camera to a large aperture to get the depth of field.
After going out and attempting macro photography, I have come to the conclusion that for me to get the best results possible, I would need to purchase a set of extention tubes. These are tubes that fit between the lens and the camera pushing the lens further towards the subject. I have read about them in digital photography magazines and on the internet. The only thing is they cost hundreds of pounds..
Macro Photography
I wanted to learn how to shoot Macro photography properly. As I went home at the weekend I figured it would be a great oppertunity to borrow my mum's macro lens and do a few experementations. I looked up tutorials and tips on the internet to help guid me and attempt to do it properly.
Research:
Switch on to macro mode
This may seem like a no brainer but many a begginer has been fustrated by the salesman's claims about macro just because they don't read the manual. This is usually represented by a small flower on the settings dial, but make sure you know where it is on your individual camera. This setting allows you to bring the camera lens closer to the subject.
Use a tripod
Although some say a tripod can be useful, I think that it is essential for any form of close-up or macro photography. It will help limit any form of user induced vibration which will give a sharper image. Camera shake is more noticable the closer you get to the subject. Getting the best should be your priority so getting a good tripod is key.
Use flash
Its not always necessery to use flash, but often it is essential as shadows are a macro photographers enemy. Try shooting where possible in bright availiable light and if necessery use some form of reflector, from a photo shop. IT would be ideal if your camera gave you control of the flash but if it doesn't use a piece of tracing paper and tape it over the flash to deffuse the harsh strobe light.
Focusing
The ability to focus manually is a big bonus when shooting macro. Because you are working with such a limited depth of focus you need to be able to determine what you want in focus. Allowing the camera to chose by auto focusing will interfere with where you want to focus. So set it manual focus and focus on the part of the subject you want in sharp focus.
Aperture
The ability to set your aperture manually is a big advantage as this allows you to control your depth of focus mentioned in point four. The technical term for this is depth of field and it determines how much of your image is in focus in front of your subject. Some cameras won't allow changing the aperture once the setting has been changed to macro mode. If you can change the aperture you'll probably use a large aperture in order to blur out the background which is very effective for close-ups.
Composition
Don't forget the rules of composition like the rule of thirds. Placing your subject and making it the focal point are essentioal to good macro photos. Often when people shoot close up composition goes out the window because they are so focused on the detail.
Self-timer
The use of your cameras self-timer is essential in limiting camera shake and vibration while pressing the shutter button. This is baiscally a delayed shutter release allowing vibrations to subside before the photo is taken. Check out your manual to see how it works on your perticular camera.
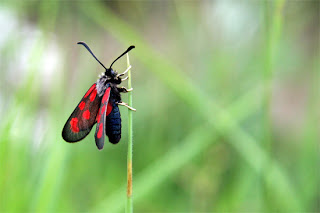
Macro photography is fun and it opens up worlds within worlds. But it can become addictive and expensive. It's always a good idea to try it out on a compact before spending money on more expensive digital SLR camera systems.
Example:
Friday, 15 October 2010
Life drawing
First attempt
later attempts
later attempts
I tried my had a life drawing this afternoon. I have done it at high school and onmy foundation course but I've not done it for a long time. I get pretty fustrated when drawing the figure from life because I find it very hard to get the proportions right, its much easier to draw from pictures! But thats why I signed up for it, I wanted to learn to draw figures correctly.
The woman teaching us loved the second image up there, she said it was a really strong drawing and proportionatly correct. My drawings at the beggining were rubbish, So I am pretty proud to have ended up with drawings like this at the end of just one session.
I learnt that charchol isn't infact my worst nightmare, and that by using stronger, sharper lines pushes that area out towards the viewer and brings the drawing into 3d life. The whole body is measured by the size of the head, this is a good way of keeping your figure in proportion throughout. It took me quite a few gos, but I finally got the hang of this idea.
I'm going to keep doing life drawing when the oppertunity comes up as I do enjoy it. The direction of my work has not changed due to life drawing, however the more drawing I do the better I get so by doing this I can only get more confident.
And again..
I tried my hand at light graffitti again, as you can see. I tried it outside this time, thinking it might have a different effect having different light to work with. I think it looks pretty effective with the bricks in the background, and the last image has the ghost of me, which is pretty cool. I dont think they turned out quite as good as I thought they would, just shows it's not quite as simple as it looks!
By practicing light graffitti I have learnt how to create interesting shapes by changing my shutter speed and making it really slow. I had done this before without realising what I was doing over a city scape and got some interesting results. But Now I know why I got those results and how to do them again.
I don't think practicing light graffitti has changed the direction of my work. It was fun to try and I enjoyed learning more about my camera but I don't think light graffitti will be included much in my work. I learnt how to create these photos through internet tutorials and occasionally asking Jenny for help. I found the tutorials worked well, I used youtube to find a video that was clear and told me what I needed to know.
Wednesday, 13 October 2010
My turn.
I started to have a go at light graffitti myself. Because I have blackout blinds in my bedroom I figured this was a pretty apropriate place to start. The only light I could find that would work was a lighter, so after setting my camera to a slow shutter speed and proped it on some draws, I started to mess around making sqiggles and attempting to write using the lighter. I found this really fun and the results arn't as bad as I thought they would be for a first run. I think I need to experement with different lights and maybe outside when it gets dark could be interesting.
Subscribe to:
Posts (Atom)