Com Tech 2
Sunday, 28 November 2010
brief evaluation
-Imporved my observational skills
-Improved my drawing techniques
-Experemented with coloured medums
-Learnt how to used coloured pencils and incorprate my skills into my illustrations
-Learnt the basics of my SLR camera
-Learnt about macro photography
-Learnt how to make a gift box
Tuesday, 16 November 2010
Luckily nothing went wrong! I wasn't quite sure how to stretch the canvas properly but I have manged to make it look reasonable. Obviously If I keep going making canvases I will learn a good technique to stretch onto the frame. For a first attempt I think it was a success.
I got compliments on the drawing and also how it still looks like a pencil drawing even though it is on canvas. I think the texture on the mane has come out very well. I forgot to draw on the whiskers but i don't think thats a major issue.


I would like to do more if this, hopefully the more I do it the more professional it will look. The only thing that I would say didn't go smoothly would be the stretching onto the frame however as I said I will look into how to do that properly. I learnt mainly from the technition for this project while looking on the internet for things that I didn't ask at the time. I think the learning process for this was pretty simple and I enjoyed taking advantage of other areas in college which I do not usually use.
I had had trouble changing my photoshop file into a TIFF file without losing all the editing I had worked on, that anoyed me a little bit, but I got there in the end. I changed the file so it was to A3 size and made sure it was in RGB colour, then it was ready to go!
I found the actual printing very simple. I took my memory stick in with me and got my image up onto the computer then the technition pressed a few buttons on the machine and it was off.
I have left my work at college to dry for a day so that will be finished blogged asap.


Saturday, 13 November 2010
Digital printing onto fabric
I have just been booked into digital print onto fabric. What I intend to do is to print one of my developed illustrations onto canvas and then stretch it over a frame to complete the canvas. Obviously it is not easy to draw straight onto canvas so digital printing seems the logical way to do this.
I am planning on making my canvas A3 / A2 size. This again is something different as I am used to working with A4.
When I went to see the technition about booking a time for me to print, I asked his how the image should be before printing.
- He told me the image should be whatever size I wanted.
- It should be in a Tif format
- The resolution should be around 350 for the size I amthinking of working with.
The technition has got about 8 different roles of different types of canvas, so I am able to chose the material which would suit what I am looking for.
If digital printing is a success and it suits my style of illustration I would be keen to keep practicing this method. It would also be a good idea to make my work a little different from the majority of the rest of the work entered into NEWA (National Exhibition of Wildlife Art) which is something I'm planning on doing in the near future.
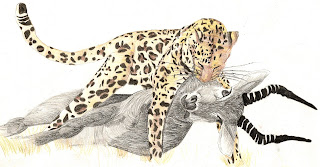
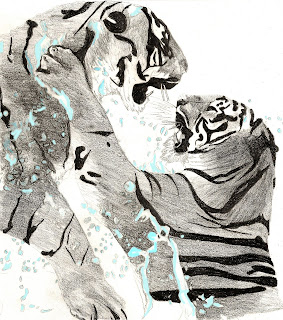
First I had to decide which illustration to print. I have been practicing the coloured pencil and graphite combination and have narrowed it down to these pieces:


I decided upon the lion because it contained the full figure rather than being cut off at the side or on the feet.
Thursday, 11 November 2010
Craft - One day project
http://www.youtube.com/watch?v=czNH7kyt7ng
I watched this and thought I would go out and buy some fabric to wrap around the box to make it christmasy. This is how it turned out:


The net turned out fine. The style of the box was just how I wanted it.
I used sissors to cut the material which I probably shouldnt have done. Next time I will use a knife and ruler as it wasnt quite straight and the edges started flaking. I glued the material to the net after the box was constructed. I wasn't sure wether to do this or to glue it while it was flat. It seemed to work fine, the joint was'nt obvious and didnt stick out.
The holes were quite hard to do. I ended up just using a pen to stick through because I didn't have a hole punch. I'm going to have to go to the shop and buy one!
I think I will do this for the proper products.
I am planning on selling constructed boxes with material and hopefully nets with illustrations printed on.
I think the process of making the box was pretty simple. The little things involved however took a bit more thought. I am glad I have done this experement because now I know what I need to buy/use to make the gift boxes look finished so more could be sold on Brown day.
Wednesday, 3 November 2010
Tuesday, 2 November 2010
Depth of field


Once I got a good possition to take a composed macro shot of the flower I decided to try and control the depth of field. Twisting the lens gently I created different depths for the flower. I learned how to do this by talking to peers and playing around with the aperatus myself. By taking the time to do this I have finally got the idea on how to produce differnent depth of field.
Extention tubes + 180mm macro lense
I was shocked as to how close I could actually zoom into my subjects. I am really pleased with the texture that is pronounced in the photos, although I struggled to get the whole object in focus. I found the reasearch that I did before using the apperatus helped me a great deal.


These are some examples of photos that didn't work as well. I found it hard getting the leaf in focus.


Monday, 1 November 2010

Camera: Canon EOS 400D / Rebel XTi
Lens: Canon EF 100/2.8 Macro USM lens
Exposure: 0.005 sec (1/200)
Aperture: f/0
Focal Length: 100 mm
ISO Speed: 100
First lets start with the home studio set up
For starters, a water drop needs to fall into something that is clear enough for you to be able to focus directly through. As you can see by my setup below, a fish tank was perfect for this. Next, I knew for me to have the best chance of capturing the drop, it had to roughly fall into the same area with each splash. Hence, I placed a bag with a small pin hole over the top of the tank. If your following along with this home studio setup, it's also important that you have good lighting and a nice cardboard background placed behind the tank for color.
Where exactly do you need to focus?
When photographing water, it's best to set your digital SLR camera to either shutter priority or manual mode (if using an extention tube). You also need to turn off your lens AF (automatic focus). Instead, prefocus through the glass and onto the tip of a pencil, held approximately 1cm above the water in the same area you anticipate the droplet to fall. When you look through the view finder, you should see a red focal point, flashing somewhere around the pencil tip. As this happens, take notice of the position you're standing from the subject. This is how you'll need to be when taking the photographs. Don't turn your camera off or change the lens focal length at this stage, or your settings will be lost. Now you're ready to pierce a small hole in that bag and start taking photographs.
Other useful tips
- Make sure you use a real macro lens for best results.
- You need to literally need to take hundreds of photographs to get a couple you will like.
- Practise makes perfect. Macro water photography takes a lot of patience.
- Try different colored backgrounds. For example, the image below was photographed with a red piece of cardboard placed behind the tank. No photoshop editing has been used other than to resize for display purposes. Hence, the red color is shown exactly how the photo was saved directly from the camera.

Info taken from www.slrphotographyguide.com

Extention tubes
I have started to research and learn about using extention tubes via websites. I found a very useful website that clearly explained what I wanted to know.
Firstly, What is a lens extension tube?
An extension tube is simply a metal or plastic tube that you connect to your setup between the digital SLR camera body and the lens. It makes the lens look as though it's longer than it actually is. Or in otherwords, it extends the lens.
Why are lens extension tubes useful?
When a photographer increases the distance of the lens further away from the body of the camera, it allows them to move closer to what they are photographing while at the same time keeping focus. This is particularly useful for macro photography where you want to be as close to the subject as possible. Without the extension tube your digital camera will uncontrollably blink numerous times to let you know your too close and you won't be able to take the photograph until you move further away.
Do extension tubes effect image quality?
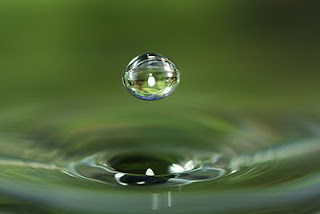
Extension tubes do not effect image quality due to the fact that it is not optically changing your camera lens. The macro photograph of a water droplet below was taken with Fotogen generic brand extension tubes attached to my macro lens.What's the difference between a brand name extension tube compared to a generic one?
Brand name extension tubes that are specifically created for your camera model can be expensive (approx $150 USD each). Whereas you can pick up a generic brand on ebay for as little as $35 for a set of 3 tubes that can be used together or separately. Fotogen, QuickSave and Kenko are some of the most popular generic brands. There is no difference in the quality of the photograph between a brand or generic tube, however when you use a generic you will loose automatic focus. Therefore the downside of going the cheaper is that you'll need to take all your macro shots in manual mode. Before purchasing the tubes make sure it specifically says they are suitable for your SLR camera. I've read that some Kenko extension tubes need adjustments made if you want to use them with Canon cameras.
Will extension tubes replace the need for an expensive macro lens?
A real macro lens has 1:1 magnification and will always give you a better photograph in more detail than adding an extension tube to a non macro lens. Having said that, if you can't yet afford a macro lens then extension tubes will give you some satisfaction in the meantime. Just don't expect them to be as high a quality as the droplet shown above.
Tips for using lens extension tubes
For those that own brand name extension tubes, it's simply a matter of connecting them to your camera setup and using it as normal. I do recommend holding your camera under the actual lens to avoid cracking your camera body due to extra weight. Not that the extension tubes are heavy. Depending on the weight of your lens it can put the overall balance out of whack.
For photographers that own generic brands, it's easier to firstly set your camera to manual mode and automatically focus (AF on your lens) on the subject without the tubes attached. Next turn off all automatic settings on your actual lens (AF to off) and connect the tubes. Then look through your viewfinder and press your shutter button half way down. Move in closer towards your subject until focus is clear then take the shot.
Info taken from www.slrphotographyguide.com
Sunday, 31 October 2010


I saw in the experements bellow, that in the areas that got missed by the water the inks didn't touch. So that gave me the idea of making patterns or shapes with the ink. The first one I tried was the cat ( that doesn't look much like a cat). The colours in it I love, but I didn't manage to control the water too well. I'd class this as a happy mistake though because I like the differnence in texture in the watered ink and the dry power.
I tried again with the Green background and a rabbit and it worked as I intended.


